Managing your design files for a smooth development handoff
Creating a well-organized and efficient design process is the key to ensuring a smooth handoff of your designs to the development team. While it will require some work at the beginning of a project, implementing a few simple practices can save you from a headache later on.
What you can do while designing
The best tip is to keep your file organized from the start. I know… easier said than done, right? But, using a few simple conventions throughout your design process will make your life easier than scrambling at the end.
Incorporate a straightforward naming convention
Avoid using Figma’s default names for files, pages, frames, groups, components, and styles. It’s best to use clear, meaningful names that make sense to anyone viewing your file.
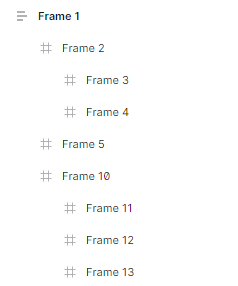
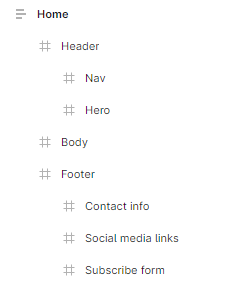
The images below are great examples of why renaming elements is important. Is it easier to decipher the different sections of the page using default names or one using descriptive names? More than likely, you will prefer the renamed layers.
Layers with Figma's default names
Layers with straightforward names
Use a design system
Incorporating a design system helps create consistent designs by using components and variables. They allow you to be more efficient as a designer and help developers since they won’t have to spend time coding elements for each page.
Keep your file organized
Your designs should be kept organized to help everyone using your file locate and identify what they need. You can achieve this using pages, where each page contains related designs, wireframes, components, styles, etc. Depending on the size of your project, this may be done in one file or multiple files. Let’s assume you have one Figma file to keep this tip simple.
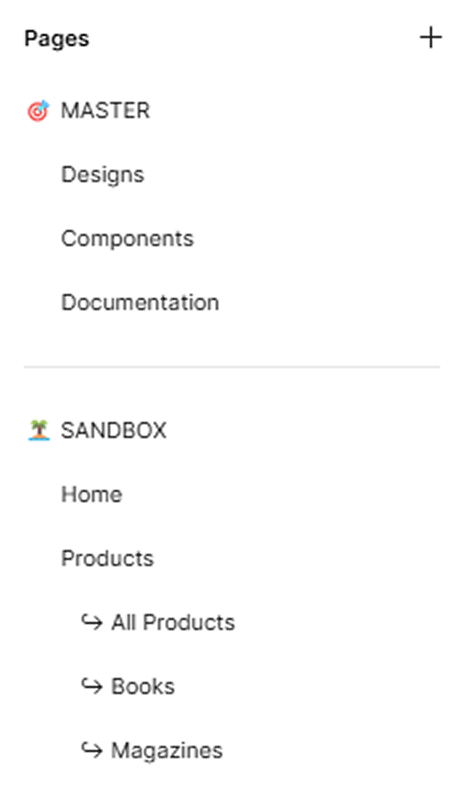
Using visual styles like dividers, icons, and typography in the pages panel, you can create distinguishable sections for your ‘master’ items and ‘sandbox’ items. The master section contains your latest designs, prototypes, and documentation. The sandbox section contains all your work-in-progress designs, which are further divided into the screens within your application or website.
File organization in Figma
Review your work
This should go without saying, but you need to review your work. Make sure the file you provide to the dev team is updated with the latest designs. Double-check all the headings, fonts, colors, spacing, and how you’re using components. Reattach any styles or components you may have detached. Make sure your designs are consistent between the different pages.
Documenting your designs
Documenting your designs can be done with annotations, notes, and built-in documentation, to name a few. Your goal when documenting should be to minimize questions from the developers. If you are unsure what to provide, don’t hesitate to ask them what details they need to streamline the development process.
Provide thorough details
Add detailed explanations and specs for any element a developer must reference. This includes your designs, components, flows, interactions, and even how the animations work. Include your explanations next to the design and use annotations when referring to specific elements to prevent any confusion.
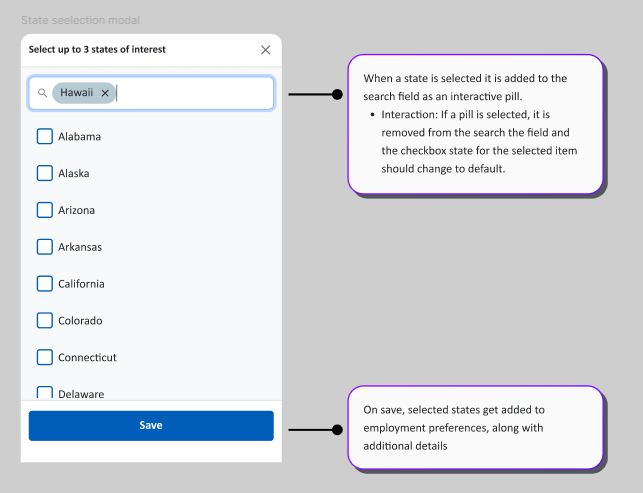
In the example below, annotations explain what should happen when a user interacts with certain elements in a modal. To further help developers, you can include a prototype or video demonstrating the interactions.
Annotated design for interactions
Use built-in documentation
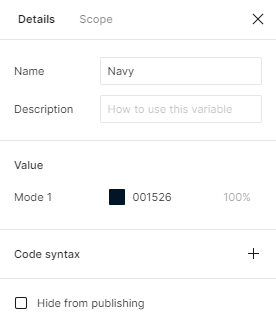
Within Figma, you can add descriptions of how and when to use individual components, variants, and variables. Using this functionality is also helpful to other designers who may not be familiar with their usage. If you decide to use this feature, make sure developers know how to access it.
Figma's component configuration panel
Figma's variable panel
Another helpful built-in feature is marking a design as “Ready for dev.” Once you’ve finished your designs and documentation, select the main frame and click the “</>” icon in the top toolbar to mark it as ready for dev so the team knows they can start working on it.
Include interactive prototypes
Prototypes help developers see how the final product should look, feel, and work. They demonstrate how animations and interactions operate, and possible user flows. You should still provide details with the prototypes for developers to reduce the risk of misunderstanding.
Helpful documentation plugins
The Figma Community offers a lot of useful plugins that can help you with your documentation process. Here are links to a few popular options.
Incorporating these best practices into your design workflow ensures that your designs are communicated and implemented as envisioned. One of our jobs, as UX Designers, is to help developers focus on development – not design. Plus, by making the developers’ job easy, we will reduce development iterations while increasing the probability of our evidence-based UX getting implemented how we designed it.